Monday, 27 April 2015

GRAPEFRUIT SUGAR SCRUB


INGREDIENTS

1. 1C Sugar
2. ¼C Oil (Coconut, Apricot, Olive, etc)
3. 14 Drops of Grapefruit Essential Oil
4. 10 Drops of Tangerine Essential Oil
5. 5 Drops of Stress Away Essential Oil
6. 1 Drop of Red Food Coloring
7. 2tsp Grapefruit Juice

DIRECTIONS

Add Essential Oils to the ¼ C of Coconut oil and mix. Then add fresh squeezed grapefruit juice and food coloring to the mixture. Finally, add the cup of sugar and mix well. Store in airtight container and use a scoop when you wash your hands.

The Stress Away essential oil is a mix of: Copaiba, Lime, Cedarwood, Vanilla, Ocotea and Lavendar. It is a nice combination of scents and blends really well with the grapefruit and tangerine essential oils.

If you make this sugar scrub, be sure to share with me what you think of it. I think it might my favorite one so far.

HOMEMADE MASCARA


INGREDIENTS

1. 2 tsp coconut oil
2. 4 tsp aloe vera gel
3. 1/2 - 1 tsp grated bees wax
4. 1 – 2 capsules of activated charcoal (for black) or cocoa powder (for brown)
5. A clean mascara container

DIRECTIONS

1. Put coconut oil, aloe vera gel, and grated bees wax in a small saucepan over low heat. Stir until beeswax is completely melted.

2. Open 1 – 2 capsules of activated charcoal (depending on desired color, about 1/4 – 1/2 tsp) and pour into oil mixture. Stir until completely incorporated. Remove from heat.

HOMEMADE FOUNDATION


Ingredients:
For the base:
Arrowroot Powder

Add one or a combination of:
Cocoa Powder
Ground Cinnamon
Nutmeg

Jojoba, Olive, or Almond Oil (optional)

Directions:

1. Start with a base of arrowroot powder (1 tsp. for dark skin – 1 Tbs. for light skin)
2. Slowly add in one or combination of the cocoa powder, cinnamon, or nutmeg until you reach your desired tone.
3. If you want more of a “compact” foundation, add some jojoba/olive/almond oil to the mixture and press down into a compact. (Start with 5 drops and keep adding until it reaches your desired texture).

Use a brush to apply this homemade foundation. Make sure to tap off excess before swiping face.

STRAWBERRY HAIR MASK


INGREDIENTS

8 Strawberries
2 Tablespoons of mayonnaise

DIRECTIONS


Blend well to form a cream
Apply generously to wet hair
Leave mask on for 15 minutes
Shampoo as normal
If you find my post interesting, then please let me know.

HEAT PROTECTION SPRAY


INSTRUCTION

1. Coconut oil
2. Almond oil
3. Hair conditioner of your choice
4. 250 ml water
5. A small spray bottle

DIRECTIONS

1. Pour 200 ml of water into spray bottle, leaving a space of 2-3 inches.
2. Add 2-3 drops of coconut oil and 4-5 drops of almond oil.
3. Pour 2 drops of your conditioner.
4. Add the rest of 50 ml water to it and shake well.


MAKEUP REMOVER PADS


INGREDIENTS

Mason Jar or Round Container
Large Round Cotton Pads
1 1/2 cup Water
2 tbsp Tear-Free Baby Shampoo
1/4 tsp Baby Oil 


DIRECTIONS
1. In a large bowel mix together the Water, Shampoo and Oil.
2. Add enough of your solution to cover the bottom of your mason jar or container.
3. Add in approximately 10 Pads (allow to soak up the solution).
4. Continue to add about 10 pads at a time pouring solution over each set to allow coverage.

MOISTURIZING PH BALANCE SHAMPOO


Ingredients
1 can full fat coconut oil (about 13.5 oz) - ph 6.1-7.0
2 Tbsp liquid raw honey - ph 3.9
1 tsp jojoba oil - ph 4.21
1 tsp astor oil - ph 4.65
2 Tbsp apple cidar vinegar - ph 3.1
1 tsp essential oils of choice 


Instructions
Combine all ingredients in a mixing bowl and whisk until smooth. This will separate some, so shake well before each use.
To use, massage a small amount on the scalp and use your fingers or a comb to spread through the hair. Leave on for a few minutes before rinsing off.
If your hair is naturally very oily, you can follow this up with an apple cider vinegar rinse made with 1/4 cup apple cider vinegar and 1/4 cup purified water.

NATURAL CURLES

1. Get your hair a little damp.
2. Put the elastic band around your forehead.
3. Get a section of hair and twist it away from your face.


4. Loop the twist around and through the headband. Add hair to your next twist and repeat looping it around the haeadband until you are out of hair.


5. Go to sleep!
6. In the morning, take out the headband and run your fingers through twisty curls, they will relax after a few minutes.

HOMEMADE BLUSH


INGREDIENTS
1. Arrowroot powder or organic corn starch
2. Beet root powder

Depending on how bright pink you want your blush will depend on how much beet root powder you use. I use about 2 parts beet root powder to 1 part cornstarch. If you want to add more depth or make it darker add a little cocoa powder!

Directions:
Start with 1 tbs arrowroot powder or corn starch and add in 2 tbs beet root powder. Mix in a small bowl making sure to break apart any clumps. Adjust color to your liking! Done!

To use: 
Dip your blush brush in the powder, tapping off any extra. Apply to your cheek bones!

HOMEMADE EYELINER


INGREDIENTS

1.4 capsule activated charcoal

2. A few drops of distilled water

3. Empty eyeshadow tin

Directions:
In a small container place 4 capsule of activated charcoal. Add a 2 drops of water and stir, continue to add water a drop or two at a time and stir until the charcoal starts to clump. Slowly add the mixture to an empty and clean eyeshadow tin and press down with your fingers until smooth.

To use:

Take a small brush like this one, dampen brush with water, wipe across pressed charcoal or dip into the loose charcoal, and use as you would normal eyeliner pencil!

For color variation:

try cocoa powder for brown. For gray just use less activated charcoal.

HEALTHY FACE MOISTERIZER


INGREDIENTS

1. 1 cup aloe vera gel
2. 3/4 ounce beewax
3. 1/4 cup almond oil
4. 1/4 cup coconut oil
5. 10 drops your favourite essential oil
6. Chocolate/soap melter or double boiler
7. Blender

HOW TO MAKE IT


1. Start by melting the beeswax and coconut oil in the almond oil.


\


2. Pour the melted oils into your blender and WALK AWAY. It is super-duper essential that that stuff get COOL before you start to blend. There is no getting around this. If you don’t let it cool it separates later. Gross. Trust me.


3. Mix the essential oil into your cup of Aloe Vera Gel.


4. Fire up the blender. Slowly pour the aloe vera gel into the blender as it whips. It’ll transform from a thick oil to a light and fluffy white lotion texture.


5. That’s it! You’ve made your own DIY facial moisturizer! Store some in a small container for your vanity, and put extra in the fridge. Keep in mind that lotion has a shelf life. Don’t use anything that looks/smells/feels wrong.


If you all like my post then please feel free to comment, share or like.


Sunday, 26 April 2015

HAIR GROWTH MASK


Ingredients:
2 tablespoons olive oil
2 tablespoons honey
1 tablespoon of cinnamon
cinnamon_for_healthy_hair

Warm the Olive oil and mix with the cinnamon, then add honey. If you like this article feel free to share or comment.

Saturday, 25 April 2015

6 HOMEMADE RECIPE FOR FLAWLESS SUMMER SKIN


1. Baking Soda and Mineral water
a.One table spoon of Baking Soda
b.Some water
Mix them together.Then massage gently on the skin and wash away with cold water.


2. Honey, Cinnamon And Coconut Flakes
a. One table spoon of honey
b. Half teaspoon cinnamon
c. Coconut flakes
Mix them together.Then massage gently on the skin for 2-3 minutes. Wash with lukewarm water.


3. Grated Cucumber And Baking Soda
a. Grind 1/3 cucumber
b. One teaspoon of baking soda.
Gently apply the mixture on your face with circular motions. If you want you can leave some of it on your face and lay down for 5 minutes, for even greater effect. Rinse with cold water. As a finish you can put two slices of cucumber on your eyes for 5 more minutes.


4. Oatmeal And Milk
a. 2 tablespoons of oatmeal
b. 50 ml milk (preferably warm) or yogurt
Mix them together.Then leave it for 1 hour, so the oats can “soak” well and release all of its beneficial substances in the mixture. Apply with circular motion and leave some of the mixture on your face for 5-10 minutes. Rinse with cold water.


5. Coffee, Brown Sugar and Olive Oil
a. 3 tablespoons of coffee
b. 3 tablespoons of olive oil
c. 1 teaspoon of brown sugar.
Mix and massage on the skin with circular motions for at least 10 minutes on your legs, ties, belly – any part of your body you want. Wash with warm water. Put your shorts on and go out!


6. Sea salt and Olive Oil
a.3-4 tablespoons of sea salt
b. the same amount of olive oil.
Massage onto your skin with circular motions for 10 minutes and then wash with warm water.

BLACKHEAD TREATMENT


Treat your skin with a face mask once or twice a week to get rid of the nasty blackheads or whiteheads as well as prevent.


Cinnamon Mask:

Mix a tbsp of honey and a pinch of cinnamon. Cinnamon is one of the best home remedies to get rid of blackheads.

Lemon Mask:
Mix lemon juice and honey. The citric acid in lemon exfoliates as well clear the skin.

Honey Mask:
Use warm honey, Honey when used regularly prevents acne and blackheads.

Tomato Mask:
Apply tomato juice, tomato helps to clear of any clogged pores.

Yogurt Mask:
Mix yogurt with lemon juice. The lactic acid in yogurt exfoliates, lightens and brightens the skin making it clean and clear.

Egg Mask:
Egg whites and lemon. Egg whites helps to shrink pores and reduce excess oils from the skin. Use any one of the above mentioned homemade face masks for about 10-15 minutes and rinse off.

Thursday, 12 March 2015

6 BEST LEAVE IN CONDITIONERS


Wave goodbye to frizzy hair with the help of few hair care solutions. Experiment with the following 6 homemade conditioner change the look of your hair.

Change the texture of your locks with a few simple beauty hacks. Use the following 6 homemade leave-in conditioner recipes to restore the elasticity and natural radiance of your strands. you can easily find these ingredients in your local stores.

1. Jojoba Oil and Aloe Vera Conditioner

Your hair can look flat and lusterless if you forget about deep conditioning. Use this simple recipe to prepare a deep repair treatment for your locks. In a bowl mix 3 oz of Jojoba Oil and 8 oz of organic Aloe Vera gel. Massage this lotion into your damp locks and leave the conditioner on without rinsing it off with water or shampoo. Use this formula on a regular basis to see the amazing results.


2. Olive Oil and Jojoba Oil Conditioner

Jojoba oil is one of the must have ingredients to revitalize and hydrate your locks. This time mix ¼ cup of jojoba oil with 1 tbs of olive oil. Add a few drops of lavender oil for the nice scent and pour the mixture in a spray bottle.

In order to boost the efficiency of this conditioner, it is important to store the green hair product in a dark-colored bottle and preferably in the fridge. Apply the formula on your damp hair before starting the styling process.


3. Olive Oil and Safflower Oil Conditioner

Save money on your hair care regime. In order to create a hydrating conditioner mix 1 cup of water, 2 tsp of safflower oil, 2 tsp of olive oil and 2 oz of your normal conditioner.

The natural ingredient will neutralize the effect of chemical ingredients from your normal conditioner and will restore the soft and silky texture of your hair after the first application. Use a spray bottle to store the homemade conditioner and apply a tiny amount of the mixture on your wet locks each time you wash your hair.


4. Coconut Oil Conditioner
It is not necessary to combine this revitalizing natural oil with any other ingredients to prepare a vitamin-rich leave-in-conditioner. Pour a tiny amount of coconut oil in your hands and rub your palms together to facilitate the uniform application of the formula. Rub the coconut oil in your wet locks, make sure you start from the ends and head towards the roots. Finally dry your locks and enjoy the soft texture of your strands.


5. Golden Jojoba Oil and Peppermint Conditioner

Prepare a cheap and extremely nourishing conditioner for your dry locks. Mix 2 oz golden jojoba oil with 4 oz of pure water and 6 drops of peppermint essential oil. Pour the lotion into a spray bottle and apply the conditioner on your wet locks. Let your tresses dry naturally or use a high-quality hair-dryer and repeat this ritual at least twice a week for quick results.


6. Apple Cider Vinegar and Water Conditioner

Prepare this super-simple and hydrating conditioner to get rid of unmanageable texture and split ends. Pour 1 cup of distilled water in a spray bottle and add 1 tbs of apple cider vinegar. Use this product on a regular basis to keep your locks in top shape. Apply a tiny spritz of this conditioner on your damp tresses and let the air dry your hair naturally.


i hope that you found my post useful and will like it if so. please go ahead if you want to comment something, any feedback will be very helpful!

8 NATURAL BEAUTY TIPS WITH BAKING SODA


1. Baking soda for skin care

A perfect natural solution for dry skin, dermatitis, ichthyosis and psoriasis

DIY medical water treatment for your skin

You will need:

baking soda – 1,2 oz, 
magnesium carbonate – 0,7 oz 
magnesium perborate – 0,5 oz,
and mix it with lukewarm water.

The water temperature should not exceed 100-102°F.

Clean your skin for about 15 minutes.

2. Use baking soda to treat acne and inflamed skin

In a cup of boiling water, dissolve 1 teaspoon of sugar and 1 teaspoon of baking soda. Then take a cotton swab and dip it into the solution and gently squeeze and rub the affected areas. Then you have to wash with warm soapy water and brush the problem areas with sesame oil. An hour later, you have to wash your skin again and this time just use warm water without soap or whatsoever.

Another way to clear up your acne:

Moisten your face. Dip the top of the towel in a bowl of baking soda and rub the skin with a gentle massage, starting from the forehead and down the cheeks and chin. This procedure is recommended to be performed regularly, at least once a week.
Note: It best to consult your beautician before using baking soda for this kind of situations.

3. Baking soda scrub

Take a small plastic cup, add 2 tablespoons of baking soda and 1/4 of your favorite shower gel, then mix everything thoroughly. Apply it as an ordinary scrub on your body and massage for about 10 minutes.

4. Treat freckles and blemishes

If you want to get rid of freckles and blemishes, use baking soda. Dissolve 6-7 tablespoons of baking soda in 1 cup of water and use the solution to gently rub the problem areas several times a day.

5. Perfect hair cleaner

Sodium bicarbonate can help to remove accumulated debris from different hair treatment means as regenerators, foams or gels. Simply add a teaspoon of baking soda in your bottle of shampoo.
If you have been to the swimming pool recently, then it is advisable to wash your hair with a solution of baking soda. Mix half a teaspoon of baking soda with 17 fl oz of water and wash your hair to remove the chlorine and to restore hair lushness.

6. Treat your nails

Clean and whiten your nails. Put a little baking soda on an old toothbrush and brush your fingernails. Use another one to brush your toenails too. Thus, the more will soften cuticles at least give you clean and whiten nails that often turn yellow from the use of nail polish in strong colors.
7. Teeth whitening

Put a little baking soda on your toothbrush and rinse your teeth.'

8. Baking soda mouthwash

It will neutralise bacteria and it will freshen your breath.
You will need:
-1 tbsp of baking soda
-3 drops of peppermint essential oil 
-a glass of water
Mix everything and your mouthwash is ready!


DRY SHAMPOO SPRAY


Ingredients:

  • 1/2 c cup water
  • 2 tablespoons arrowroot powder or cornstarch 
  • 2 tablespoons vodka – rubbing alcohol can also be used, but it is more drying 
  • A few drops of essential oil, optional (lemon, peppermint, rosemary, bergamot, lemongrass and lime are good options)

To Make:

Combine all ingredients thoroughly and pour into a spray bottle.

To Apply:

Arrowroot and cornstarch powder tends to settle at the bottom between uses, so shake thoroughly. (Also, apply before you get dressed to go out. The spray may land on clothing and leave a light layer of powder.)

Hold spray bottle about three inches from hair and apply wherever it looks greasy. Hair should be damp, but not soaking wet. Dry with a hair dryer – this will only take a couple of minutes because it’s just damp- then touch up any spots you missed if necessary. Style like you normally would.

Wednesday, 11 March 2015

EXFOLIATION ........... ITS MORE THAN JUST FACE!


I don’t know about you….but regular exfoliation is one of the most-neglected item in my often-neglected skin regime! I mean I’m not very good about even WASHING my face as often as I should….let alone taking the time to give it a good scrub! But according to health and beauty experts…proper exfoliation is necessary (mandatory even!) to achieve and maintain healthy, glowing skin!

The reason it’s so important is because layers of dead cells dull the surface of your skin. When we exfoliate, the dead cells are sloughed off and new cells are produced to replace them. News cells = healthy glow.

But it’s not just our FACES that need exfoliating…there are places all over our epidermis that can benefit from a good scrubbing!


Lips

Regular exfoliation keeps the lips soft, supple and less flaky, which means your lipstick will go on much smoother. But keep in mind, lips are very sensitive and your regular face scrub might be too rough.


You can use a soft toothbrush or washcloth or you can try a homemade lip exfoliant out of aspirin and fine sugar! Crush four aspirin and mix with a teaspoon of sugar, a few drops of jojoba oil (or sweet almond oil) and 1/4 teaspoon of glycerin. The glycerin helps the powdered aspirin and sugar to “stick” to your lips while you scrub them.


Neck

It makes sense that if you are exfoliating the skin on your face regularly, you would want to extend it to your neck as well so that the tone of your face and neck match. Since neck skin is also fairly sensitive I would stick with your FACIAL scrub rather than a BODY scrub.


Here’s a trick from 50thavenuesalon.com: get a cute salt or pepper shaker and fill it with sugar. (I use regular granulated sugar, but I’ve heard good things about organic raw sugar too). Put the container of sugar on your bathroom counter or in your shower, wherever you normally wash your face, and simply sprinkle some into the palm of your hand along with whatever you wash your face with.


Body

Based on the number of BODY SCRUBS I see pinned on Pinterest, I’d say a LOT of you are using them fairly regularly. This is a good thing. If you use sunscreen or other types of lotions regularly, then exfoliation is important so that your pores don’t become clogged by the ingredients. While there are some good commercial body scrubs out there….I think the homemade scrubs are by far the best! (Not to mention the most economical!)


Armpits

Even if you regularly SHAVE your armpits, they can end up looking dark due to the accumulated residue from perspiration and deodorant or anti-perspirant. Regular exfoliation is necessary to rid the residue and keep the area clean, and may help remove ingrown hair. Once again, since this part of your body is more delicate, use a FACIAL scrub or a loofah instead of your body scrub.


Elbows & Knees

When exfoliating your body, don’t forget to pay special attention to your elbows and knees. Your regular body wash or soap alone just won’t cut it on these more stubborn areas.


Feet & Heels

A much-neglected area. If you get regular pedicures, then you’re probably already getting the exfoliating treatment on your feet. But for those of us who don’t, remember to extend your body scrub to your feet and heels as well. A pumice stone works well on rough heels, but I think a good scrub is SO much nicer!


You might want to try this DIY Hot Salt Scrub recipe from Viva Woman, or you can purchase the original Bliss Hot Salt Scrub online. So nice!!!


Cuticles

Hands in general don’t need much exfoliation because we are always washing them. However, dead skin does accumulate around the cuticles. Since I’ve never been one to clip my own cuticles (I would probably sever an artery if I tried!) I prefer to gently push them back and then use my regular body scrub to get rid of any dead skin buildup. Toes cuticles get the same treatment with foot scrub.


Keep in mind that while exfoliation is important, you don’t need to exfoliate every day. After all, the purpose is to slough off dead skin cells and if you have already scrubbed them off there is no point in scrubbing further. Too much exfoliation will obviously damage the healthy cells, so keep it to a routine of about once a week.

HOLI SPECIAL: PROTECT YOUR SKIN AND HAIR FROM HOLI COLOURS

People make most of the festival by playing with colours, water guns, water filled balloons, etc. But this vibrant festival can also cause damage to your skin and hair. Here are few tips to make your Holi
safe and joyful:


- Make sure that you apply a good sunscreen or moisturizer before or after you play with colours.


- Use vaseline, olive oil, coconut oil, mustard oil on your face and body.


- Oil your hair with coconut, olive or castor oil. Doing so will protect your hair from damage by harmful chemicals. It will also make it easier to remove while washing off colours.


- You can also cover your head with a thick scarf to protect your hair from being soaked in colour.


- Protect your lips by using a good lip gloss/lip balm.


- Paint your nail- both in fingers and toes with transparent nail polish (preferably red or pink colours) to protect your nails from harsh effects of colours.


- If you are prone to rashes or allergies, consult a dermatologist whether you need to take preventive measures for your skin.


- Before stepping out to play with colours, you should use a toner to close your skin pores and to reduce the chances of damage on your skin.


- You can protect your skin by wearing long sleeves and full length bottoms.


- Never sit in sunlight after playing with colours as it will make difficult to remove as well as harm your skin.


- Try using natural colours such as henna, turmeric, marigold flowers, tomatoes and tea leaves for a safe and skin-friendly Holi.


- Always clean your face with a cleansing milk or lotion with a cotton wool after playing with colours. Never wash your face with harsh soaps, especially when it is wet, doing so can damage your skin causing further dryness.


- You can also massage your face and body with til oil to remove colours.


- Rinse your hair with plenty of water to wash off colours. Use mild and herbal shampoo to avoid further damage. You can also add lemon juice to a mug and use it as a last rinse to restore cid-alkaline balance of the scalp.


- You can also apply a hair pack- one good option is a mixture of henna powder, lemon juice and curd. You can apply this on your hair and wash off after an hour.


- Ensure that your eyes are well protected with glasses at all times. Eyes are extremely vulnerable during Holi due to the use of harmful chemicals in colours.


- Do not take bath immediately after the play since taking frequent baths and washing your face and hair repeatedly will ruin your skin as well as your scalp. Do it much later after the celebration is over.


So, here’s wishing you all a happy and safe holi.

HOW TO MAKE BATH BOMB FIZZIES

INGREDIENTS:
  • 1 cup citric acid
  • 2 cups baking soda
  • witch hazel
  • coloring of your choice
  • fragrance oil of your choice
  • any shaped molds or dome molds
  1. blend the citric acid and baking soda-it is a good idea to blend it using a blender and mortar to grind it down into a very fine powder.
  2. After that add your colouring.
  3. Add your fragrance oil enough to your liking.
  4. Fill your smart squirt bottle the witch the hazel- spritz your above dry mixture with the witch hazel and mix it all together until the mixture it sticks together when squeezed. this is the best way to test them work work fast and do not add to much witch hazel. pack them hard and firmly into molds. let them dry about 4 hours. Then remove your bath fizzies and take a bath!


Wednesday, 25 February 2015

HOMEMADE BERRY LIP BALM

Ingredients required


  • 1 raspberry
  • 3 blackberries
  • 1/2 spoon extra virgin olive oil
  • 3 pomegranates seeds
  • spoon
  • small jar
Method of preparation

step 1:
with the help of back of spoon, mash raspberry and blackberries.
step 2:


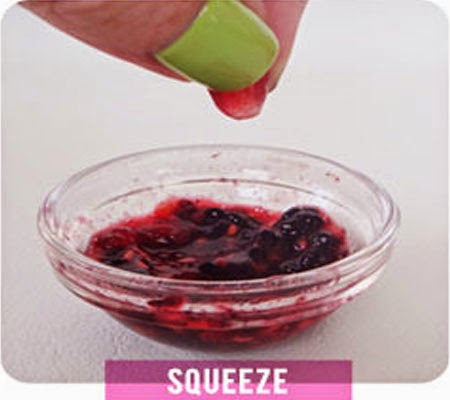
squeeze the juice of individual pomegranate with the help of your index fingers and thumb over the bowl of raspberry and blackberry mixture.

step 3:  

add olive oil to it and stir well.

step 4:
 strain the mixture in a small jar.


How to apply?

apply on your lips with the help of your fingers. refrigerate it for 5-7 days.